(This lesson was shared at the NAEA Convention 2007 in New York by Ginny Lane, the Pacific Region Director, but I created it for my beginning college students in the early 90's, and then geared it to younger adolescents. It helps them to practice contour, loosen up, and learn more about uses of materials. Please feel free to e-mail me, if you any questions or suggestions!)
This is a lesson that works well with students in beginning drawing courses.
SHOES AND CONTOUR CONTINUATION
OBJECTIVES:
- To improve observational skills and hand-eye coordination.
- To improve mark-making skills using a variety of media.
- To increase knowledge of composition, unity, pattern, contrast, and value.
- To understand that creating art requires steps, processes, and to utilize problem-solving skills.
- To understand the importance of art in society, and to consider this from the viewpoint of not only the audience, but also the makers of art.
ART HISTORY:
- To explore shape, mass, and flat surfaces similarly to Henri Matisse.
- To explore contour continuation as Cezanne did, and subsequently Picasso and Braque.
DIRECTIONS:
- Bring shoes from home.
- Practice contour drawing and observational skills by drawing shoes without looking at the paper or lifting the pencil.
- Continue this, but now look down at the paper from time to time, and every now and then lift pencil.
- Create 7-9 pairs of shoes. Shoes should be at varying viewpoints (above, the side, the bottom, ¾ view, foreshortened, etc.)
- On a large drawing paper, transfer the shoes in an interesting design. You may use the window or a light box to transfer images. Make sure to create a one-inch border around your paper first.
- Create an interesting design. You may repeat a shoe drawing more than once.
- Look carefully at your space. If you need to break it up, you may take a line from a shoe and continue it to the edge of the paper.
- You may take a geometric shape, and draw it over the shoes.
- Using colored pencils, markers, or pastels fill in the spaces. You may use more than one color in each space and will probably need to create several layers. You may add textures, as long as you repeat it elsewhere in your work. You may smooth out or leave rough.
- Have a partner critique your work, and you critique his/her work. Stand far away and check your work again.
- Make sure your name and period are on the back, and now you may turn in your masterpiece!
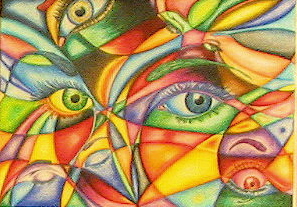
(You may substitute hands, feet, eyes, plants, etc., with this lesson. I often use hands with the high school students.)
By Jessica Flemming (Ms. Licht's 1A course.)
|